Table of Contents
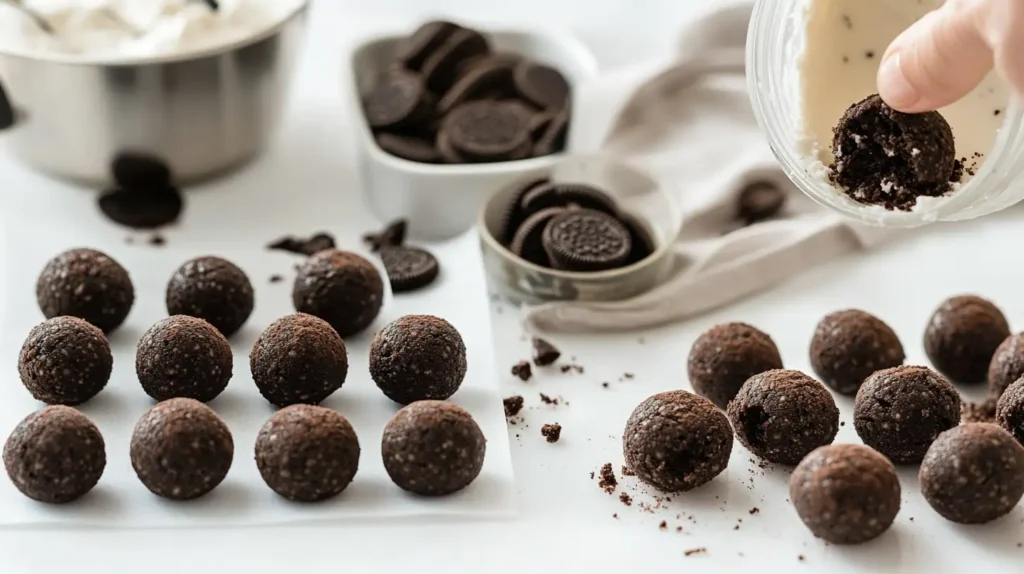
Looking for a quick, delicious, and no-bake dessert? Say hello to Oreo Balls! This easy Oreo balls recipe is a game-changer, perfect for holidays, parties, or whenever that sweet tooth kicks in. With just three main ingredients,Oreo cookies, cream cheese, and chocolate coating, you can whip up a batch of these bite-sized treats in no time.
In this article, we’ll take you through everything you need to know about Oreo balls, from their origin to pro tips on achieving the perfect chocolate coating. You’ll also get a step-by-step guide on how to make them, fun variations, storage tips, and answers to frequently asked questions.
Whether you’re a beginner or a seasoned baker, this Oreo balls recipe is a must-try.
What Are Oreo Balls?
The Origin of Oreo Balls
Ever wondered where Oreo balls came from? These delightful treats, also known as Oreo truffles, started as a simple homemade dessert that quickly became a viral sensation. Their popularity soared thanks to their minimal ingredients, no-bake simplicity, and irresistible flavor.
Originally, home bakers discovered that blending crushed Oreo cookies with cream cheese created a rich, truffle-like texture. The mixture was then rolled into small balls and coated with melted chocolate, resulting in a dessert that tastes just like a gourmet truffle, but with half the effort!
Over time, food lovers began experimenting with different coatings, toppings, and mix-ins, making Oreo balls a highly customizable treat for every occasion.
Why Oreo Balls Are the Perfect No-Bake Treat
So, why do people love Oreo balls so much? Here are a few reasons why they’ve become a go-to dessert:
- Only 3 Main Ingredients – You don’t need a long shopping list! Just grab Oreo cookies, cream cheese, and chocolate to get started.
- No Baking Required – If you love easy desserts, this is for you! Simply mix, roll, chill, and dip, no oven needed.
- Perfect for Any Occasion – Whether it’s Christmas, birthdays, or just a weekend treat, these Oreo truffles fit every celebration.
- Endless Variations – From mint and peanut butter to holiday-themed decorations, the customization possibilities are endless.
- Make-Ahead Friendly – These little delights store well in the fridge or freezer, making them a great prep-ahead dessert.
Essential Ingredients for the Best Oreo Balls
Getting the right ingredients is the key to making the perfect Oreo balls recipe. While the base remains simple,Oreos, cream cheese, and chocolate, a few ingredient tweaks can take your Oreo truffles to the next level.
Choosing the Right Oreos: Classic vs. Golden vs. Flavored
Not all Oreos are created equal! The type of Oreo cookies you choose will directly impact the flavor and texture of your truffles.
- Classic Oreos – The go-to choice for traditional Oreo balls, giving you that deep chocolate flavor with a hint of vanilla from the filling.
- Golden Oreos – Perfect for a lighter, vanilla-based twist. If you’re a fan of white chocolate, Golden Oreos work exceptionally well.
- Flavored Oreos – Want to get creative? Try mint, peanut butter, birthday cake, or even red velvet Oreos to add a unique spin to your truffles.
💡 Pro Tip: If you use flavored Oreos, consider adjusting the cream cheese amount slightly to balance the sweetness.
Best Chocolate Coatings: Almond Bark vs. Chocolate Chips
Dipping your Oreo balls in melted chocolate is what gives them that smooth, candy-like shell. But what’s the best chocolate to use?
- Almond Bark – The easiest option for dipping! It melts smoothly, hardens quickly, and doesn’t require tempering.
- Chocolate Chips – A great alternative, but you’ll need to add a bit of coconut oil or shortening to keep it from seizing up when melted.
- White Chocolate – If you want a sweeter, creamier finish, opt for white chocolate. It pairs well with Golden Oreos.
- Dark Chocolate – For a richer, slightly less sweet option, dark chocolate adds a gourmet touch.
🔹 Pro Tip: If using white chocolate, try adding a few drops of food coloring to match the theme of your event!
Tools and Equipment You Need
Before you dive into making Oreo balls, make sure you have the right tools on hand. These will help make the process quicker, easier, and mess-free.
Must-Have Kitchen Tools for Oreo Balls
- Food Processor or Blender – Crushes Oreos into fine crumbs effortlessly. No food processor? Place the cookies in a Ziploc bag and crush them with a rolling pin.
- Mixing Bowl – A large bowl is essential for combining the Oreo crumbs and cream cheese.
- Hand Mixer or Spoon – To ensure the mixture is well-blended. A hand mixer speeds things up, but you can also mix with a sturdy spoon.
- Cookie Scoop or Melon Baller – Helps create uniform-sized Oreo balls for a professional look.
- Wax Paper or Parchment Paper – Prevents sticking and makes cleanup a breeze.
- Toothpicks or Forks – Essential for dipping the truffles into melted chocolate without making a mess.
Pro Tips for a Mess-Free Preparation
- Chill Before Dipping – Once you roll your Oreo balls, refrigerate them for at least 1 hour before coating. This keeps them firm and prevents melting in the warm chocolate.
- Use a Fork for Dipping – Instead of using fingers, dip each ball using a fork or toothpick, then let the excess chocolate drip off before placing them on wax paper.
- Work in Batches – If your Oreo truffles start to soften while dipping, pop them back into the fridge for a few minutes before continuing.
Recipe 🌟 – How to Make the Perfect Oreo Balls Recipe

Craving a quick, no-bake dessert that tastes like a gourmet treat? This Oreo balls recipe is the answer! With just a handful of ingredients, you can whip up rich, creamy truffles covered in smooth chocolate, perfect for parties, gifts, or just a personal indulgence.
Ingredients 🛒
Here’s everything you need to make these easy, no-bake Oreo truffles:
- 1 (16 oz) package Oreo cookies – crushed into fine crumbs
- 1 (8 oz) package cream cheese – softened
- 1 (24 oz) package white chocolate bark – melted
- 1 (24 oz) package chocolate bark – melted
📝 Optional Additions: Sprinkles, crushed nuts, coconut flakes, or a drizzle of extra chocolate for decoration.
Directions 👩🍳
Follow these simple steps to create the best Oreo balls:
- Crush the Oreos – Use a food processor to blend them into fine crumbs. No processor? Place them in a sealed plastic bag and crush with a rolling pin.
- Mix with Cream Cheese – Combine the Oreo crumbs with softened cream cheese in a bowl until smooth. A hand mixer makes this easier, but you can also use a spoon.
- Roll into Balls – Scoop and roll the mixture into bite-sized balls (about 1 inch in diameter). Place them on a wax paper-lined baking sheet.
- Chill for an Hour – Refrigerate the Oreo balls for at least 60 minutes to firm up before dipping.
- Melt the Chocolate – Microwave the white chocolate bark in 30-second intervals, stirring until smooth.
- Dip the Balls – Use a fork or toothpick to dip each ball into the melted chocolate. Let excess chocolate drip off before placing it back on the wax paper.
- Decorate & Set – Once dipped, drizzle with melted dark chocolate or add sprinkles before the coating hardens. Let the Oreo balls set at room temperature or refrigerate for 10–15 minutes.
🎉 That’s it! Your delicious, homemade Oreo truffles are ready to enjoy.
Additional Info 📋
- Prep Time: 15 minutes
- Chill Time: 1 hour
- Total Time: 1 hour 15 minutes
- Servings: 25–35 balls
- Storage: Keep refrigerated for up to 1 week or freeze for up to 2 months.
💡 Pro Tip: If you love a crunchier texture, add crushed candy canes, toffee bits, or graham crackers into the Oreo mixture before rolling!
Customizing Your Oreo Balls Recipe
One of the best things about Oreo balls is how versatile they are! You can easily customize them to match holidays, flavors, or dietary preferences.
Fun Variations: Peanut Butter, Mint, and More

Why stick to the classic version when you can get creative? Here are some delicious twists on the original recipe:
- Peanut Butter Oreo Balls – Mix 2 tablespoons of peanut butter into the Oreo-cream cheese mixture for a rich, nutty flavor.
- Mint Chocolate Oreo Balls – Use Mint Oreos and drizzle with green-colored white chocolate for a refreshing twist.
- Red Velvet Oreo Balls – Swap out classic Oreos for Red Velvet Oreos and coat with white chocolate for a festive touch.
- Cookies & Cream Truffles – Use Golden Oreos instead of regular ones and mix in crushed chocolate chips for a cookies-and-cream flavor.
- Dulce de Leche Oreo Balls – Add a teaspoon of caramel extract into the mixture and drizzle with extra caramel on top.
💡 Hosting a themed party? Decorate your truffles with colored sprinkles, edible glitter, or holiday-themed toppings!
The Best Toppings for Extra Flavor
Want to make your Oreo balls recipe even more fun and visually appealing? Try these topping ideas:
- Classic Sprinkles – Add a festive touch with rainbow or holiday-themed sprinkles.
- Crushed Nuts – Almonds, pecans, or walnuts add a crunchy contrast.
- Shredded Coconut – Perfect for a tropical flavor.
- Graham Cracker Crumbs – Creates a cheesecake-like finish.
- Sea Salt – A pinch of flaky salt enhances the sweetness of the chocolate.
💡 Pro Tip: For an elegant finish, dust your truffles with cocoa powder or edible gold flakes!
🌟 For more delicious no-bake dessert ideas, check out other tasty recipes on Palmy Recipes.
Storage and Make-Ahead Tips
Making a big batch of Oreo balls? No problem! These truffles store well, so you can prep them in advance for parties, gifts, or late-night cravings.
How to Store Oreo Balls for Maximum Freshness
Proper storage is the key to keeping your Oreo balls fresh and delicious. Here’s what you need to know:
- Refrigeration: Keep your Oreo balls in an airtight container in the fridge. They stay fresh for up to 1 week.
- Freezing: Need long-term storage? Freeze them in a sealed Ziploc bag for up to 2 months. Just thaw them for a few minutes before serving.
- Avoid Moisture: Humidity can cause the chocolate coating to get sticky. Store them in a cool, dry place.
💡 Pro Tip: If stacking the truffles, place parchment paper between layers to prevent sticking.
Freezing Instructions: Can You Freeze Oreo Balls?
Yes! Freezing Oreo balls is a great way to keep them ready for any occasion. Here’s the best method:
- Flash Freeze First – Arrange the Oreo balls on a baking sheet and freeze for 1 hour before transferring them to a freezer bag.
- Use an Airtight Bag or Container – Prevent freezer burn by storing them in a sealed container or a double-layered freezer bag.
- Thaw Properly – When ready to eat, let them thaw in the fridge for 15–20 minutes before serving.
💡 Pro Tip: Planning ahead for the holidays? Make Oreo balls in advance and freeze them! They’ll be just as delicious when defrosted.
“Looking for more no-bake dessert ideas? Check out these easy no-bake dessert recipes on AllRecipes for more inspiration!”
Troubleshooting Common Oreo Ball Issues
Even though Oreo balls are easy to make, small mistakes can lead to messy, uneven, or cracked truffles. Let’s fix that!
Why Are My Oreo Balls Falling Apart?
If your truffles won’t hold their shape, the mixture might be too dry. Here’s how to fix it:
- Not Enough Cream Cheese? Add a tiny bit more cream cheese to bind the mixture.
- Crumbs Too Large? Blend the Oreo cookies into fine crumbs, chunky pieces won’t stick well.
- Not Chilled Enough? Always refrigerate the balls for at least an hour before dipping.
💡 Pro Tip: If you’re in a hurry, pop them in the freezer for 20 minutes instead of refrigerating!
How to Get a Smooth, Even Chocolate Coating
Dipping Oreo balls in chocolate seems simple, but if your coating turns out lumpy or uneven, here’s what to do:
- Chocolate Too Thick? Add ½ teaspoon of coconut oil or vegetable shortening to help it melt smoothly.
- Dipping Mess? Use a toothpick or fork instead of fingers to coat the balls evenly.
- Chocolate Not Sticking? If your Oreo balls sweat or become too warm, re-chill them before dipping.
💡 Pro Tip: Want a glossy, professional-looking finish? Let the chocolate set at room temperature instead of rushing it into the fridge.
Frequently Asked Questions (FAQs)
Got questions about making the perfect Oreo balls? You’re not alone! Here are the most commonly asked questions to help you master this no-bake treat.
Do Oreo Balls Need to Be Refrigerated?
Yes! Since Oreo balls contain cream cheese, they should always be stored in the fridge. Leaving them out for too long can cause the filling to soften or spoil. If serving at a party, keep them chilled until just before serving.
Can I Use Different Types of Chocolate?
Absolutely! You can coat your Oreo balls in:
- White Chocolate – For a sweeter, creamier flavor.
- Dark Chocolate – Adds a slightly bitter contrast to the sweet filling.
- Milk Chocolate – A classic choice that pairs well with Oreo’s signature flavor.
💡 Pro Tip: For a gourmet touch, mix white and dark chocolate for a marbled effect!
How Long Do Oreo Balls Last?
- Refrigerator: Up to one week in an airtight container.
- Freezer: Up to two months if stored properly in a Ziploc bag.
If you’re planning ahead for a party or the holidays, freezing is a great option. Just thaw them in the fridge for about 20 minutes before serving!
Can I Make Oreo Balls Without Cream Cheese?
Yes! If you don’t want to use cream cheese, try these alternatives:
- Condensed Milk – Adds sweetness and binds the mixture together.
- Peanut Butter – Great for a nutty twist.
- Mashed Bananas – A dairy-free alternative that adds natural sweetness.
Are Oreo Balls Gluten-Free?
Not by default, but you can make them gluten-free by using gluten-free Oreos! The process remains the same, just swap the cookies.
Can I Use Double Stuf Oreos?
Yes! However, the extra filling makes the mixture softer, so you may need to add fewer cookies or chill longer before rolling into balls.
What’s the Best Way to Drizzle Chocolate on Oreo Balls?
To get clean, professional-looking drizzles, use:
- A Piping Bag – Fill it with melted chocolate and cut a small hole at the tip.
- A Spoon or Fork – Dip and flick it over the Oreo balls for an effortless drizzle effect.
💡 Pro Tip: If the drizzle is too thick, add a teaspoon of coconut oil to the melted chocolate for a smoother consistency.

No-Bake Oreo Balls
Equipment
- Food Processor
- Mixing Bowl
- Baking Sheet
- Parchment paper
- Toothpicks or Forks
Ingredients
Oreo Ball Mixture
- 1 package Oreo cookies 16 oz, crushed into fine crumbs
- 1 package cream cheese 8 oz, softened
Chocolate Coating
- 24 oz white chocolate bark melted
- 24 oz chocolate bark melted
Optional Toppings
- sprinkles for decoration
- crushed nuts optional for added crunch
- coconut flakes optional for a tropical twist
- extra melted chocolate for drizzling
Instructions
- Crush the Oreos using a food processor until they become fine crumbs. If you don’t have a processor, place them in a sealed plastic bag and crush with a rolling pin.
- Mix the Oreo crumbs with softened cream cheese in a bowl until fully combined. A hand mixer makes this easier, but you can also use a spoon.
- Roll the mixture into bite-sized balls (about 1 inch in diameter) and place them on a parchment-lined baking sheet.
- Refrigerate the Oreo balls for at least 60 minutes to firm up before dipping.
- Melt the white and chocolate bark in separate bowls in the microwave, stirring in 30-second intervals until smooth.
- Use a fork or toothpick to dip each ball into the melted chocolate. Let excess chocolate drip off before placing it back on the parchment paper.
- While the chocolate is still wet, decorate with sprinkles, crushed nuts, coconut flakes, or a drizzle of extra melted chocolate.
- Let the Oreo balls set at room temperature or refrigerate for 10–15 minutes until the chocolate hardens.
- Enjoy your delicious, homemade Oreo truffles! Store extras in an airtight container in the fridge for up to one week or freeze for up to two months.
Notes
Final Thoughts – Why Oreo Balls Are a Must-Try Dessert
At this point, you know everything there is to know about Oreo balls! From choosing the right ingredients to customizing flavors and storing them properly, you’re now fully equipped to make this irresistible no-bake dessert.
Perfect for Holidays, Parties, and Gifting
One of the best things about Oreo balls is their versatility. They’re:
🎉 Perfect for Any Occasion – From Christmas to birthdays, these truffles fit every celebration.
🎁 Great for Gifting – Package them in a cute box or bag for a homemade gift.
🍪 Customizable – Change the coatings, mix-ins, and toppings to create unique flavors.
Final Tips for the Best Oreo Balls Every Time
Before you get started, here are some last-minute pro tips to ensure your Oreo truffles turn out perfect:
✅ Use a food processor for the finest Oreo crumbs.
✅ Chill before dipping to prevent melting.
✅ Thin out the chocolate with a little coconut oil for smoother dipping.
✅ Experiment with flavors, try different Oreo varieties, coatings, and toppings!
Now, it’s your turn to make the best Oreo balls recipe! Grab your ingredients, follow the steps, and enjoy these delicious, bite-sized treats. 🍫✨
